Blender 3D: A brief introduction to the most popular open-source 3D software
Model, animate, create.

Blender is a free and open-source 3D modeling and animation software. It comes with a robust toolset capable of producing professional-quality 3D models and animations at no cost.
Download and Installation: Head over to the Blender Website and go to the downloads section. Blender is available for all major operating systems, you may download the latest version (2.91.0 at the time of writing) from over there. Run the Installer and follow the required steps to complete the installation.
Brief Analysis of the Features
Before we begin, make sure you get a mouse, as working with 3D using a mousepad is difficult and impractical at the same time. On opening the Blender for the first time we are greeted with the following prompt, set the controls to as given in the image below.

To close the splash screen, press Esc. Now you would be observing 3 objects on the screen, namely a cube, a light setup, and a camera. This area is called the 3D viewport where most of the modeling work takes place.
To select all the objects in the viewport, click A and to deselect them you may double-click A. When objects are selected in Blender there is an orange highlight over them. To delete the objects you may click X on the keyboard.
Since now our scene looks empty, it is fitting we get down to some work!
Adding Objects in Blender

To add some objects into the scene we have the keyboard shortcut Shift + A, which opens up the Add Menu which has a wide variety of items to add into the 3D viewport such as meshes, text, etc. Inside Mesh there is a list of 3D primitives like Sphere, Cylinder, and Cube which can be later used for the creation of more complex 3D models.
Select Cylinder form the list of options inside the Mesh menu.
The cylinder gets placed in the scene, with a red ring at the centre of the cylinder which is called the 3D cursor. It is used as a central reference point for any object you place in the 3D space in Blender. The 3D cursor can be located inside or outside the 3D object.
Toolbars and Controls

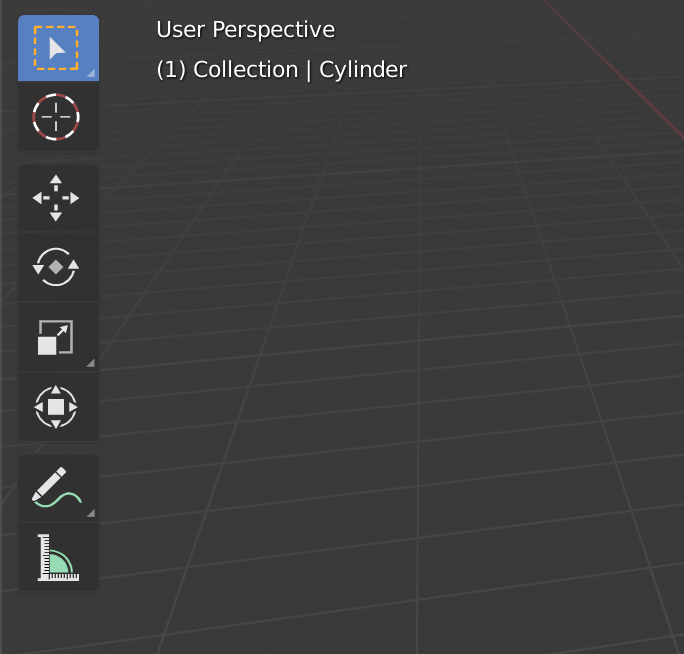
On the left of the 3D viewport, we have a toolbar where the options of Select, Cursor, and Move are present. It can be hidden or shown by pressing T. We will discuss these options in detail.
- The first icon is the Select tool, we use it to select the objects in the 3D scene.
- The second icon is the Cursor tool, we can move the 3D cursor away from its original position to place 3D objects at different points of origin
- The third icon, the Move tool gives a selection point on any object that you select and gives you the option to move it in 3 different axes- X, Y and Z.
Navigation Shortcuts
We also need to navigate our way around in the Blender 3D workspace, for those operations we have the following shortcuts:
- Zoom: To zoom in or out, use the mouse wheel. Pan around the 3D space holding Shift and the Middle Mouse Button and drag around the mouse.
- Orbit: For orbiting around the object, hold the Middle Mouse Button and drag the mouse.
To alternate between the various shading modes offered by the Blender, we have the following and shortcuts:
- Material Mode: This mode is particularly suited for previewing materials and texture painting and the shortcut for it is Z+2.
- Wireframe Mode: This mode shows the full scene by only displaying the edges of the objects and the shortcut for it is Z+4.
- Solid Mode: This mode shows the full scene in a solid but a single dull white colour with no materials or textures visible and the shortcut for it is Z+6.
- Render Mode: This mode is used to view the rendered version of your entire scene and the shortcut for it is Z+8.
We were able to get an idea of how Blender 3D works and basic controls used by modellers to leverage its raw power. Keep following me for upcoming tutorials on Blender 3D, Happy Learning!

